Step-by-Step Guide to Prepare Any-night-of-the-week Fresh Strawberry Chiffon Cake
Hey everyone, I hope you're having an incredible day today. Today, I will show you a way to prepare a special dish, Simple Way to Make Ultimate Fresh Strawberry Chiffon Cake. One of my favorites food recipes. This time, I am going to make it a little bit tasty. This will be really delicious.
When it comes to cooking, it's crucial to take into account that everyone else started somewhere. I do not know of a single person who came to be with a wooden cooking spoon and ready to go. There's a lot of learning which must be done in order to develop into a prolific cook and then there is obviously room for advancement. Not only do you need to begin with the basics in terms of cooking however you nearly need to begin again if understanding how to cook a new cuisine such as Chinese, Thai, or Indian food.
Nutritious cooking is often difficult as many people do not want to spend time preparing and planning meals which our own families will not eat. At the exact same time, we need our families to be healthy so that we are feeling pressured to master improved and new ways of cooking healthy foods to our family to love (and regrettably in certain cases scorn).
Cooking healthy isn't an overnight change; it is a life style change that should be implemented one step at the same time. You don't need to get in your kitchen and through every tiny thing you deem'Bad' just work to not buy these items after they will have already been used. Make wiser decisions when purchasing fats for food preparation and you may quickly realize that you've made an extremely important step in the process of integrating healthful cooking and eating habits at house.
Many things affect the quality of taste from Fresh Strawberry Chiffon Cake, starting from the type of ingredients, then the selection of fresh ingredients, the ability to cut dishes to how to make and serve them. Don't worry if you want to prepare Fresh Strawberry Chiffon Cake delicious at home, because if you already know the trick then this dish can be used as an extraordinary special treat.
As for the number of servings that can be served to make Fresh Strawberry Chiffon Cake is 6 servings. So make sure this portion is enough to serve for yourself and your beloved family.
To get started with this recipe, we must prepare a few ingredients. You can cook Fresh Strawberry Chiffon Cake using 12 ingredients and 17 steps. Here is how you can achieve it.
I love chiffon cakes Above all, I fell in love with user Eiri's "Perfect Recipes Chiffon Cake "and modified it to my liking. My family's favorite variation is this "Fresh Strawberry Chiffon Cake".
Make sure to whip up a stiff meringue with good quality eggs, and to mix the egg yolk batter and meringue well. Adjust the baking time and temperature based on your oven. This recipe is best for a 17 cm chiffon cake; double the ingredient amounts when using a 20-21 cm [7.9-8.3 in] pan. Recipe by Mani-.
Ingredients and spices that need to be Make ready to make Fresh Strawberry Chiffon Cake:
- Egg yolk batter
- 2 Egg yolks
- 35 grams Powdered sugar (or castor sugar or light brown sugar)
- 2 tbsp Vegetable oil
- 75 ml Strawberry juice (refer to Step 2)
- 1 tsp Brandy (or your preferred liquor)
- 67 grams Cake flour
- Meringue Batter
- 4 Egg white
- 1 pinch Salt
- 35 grams Powdered sugar
- 8 grams Corn starch (or katakuriko)
Instructions to make Fresh Strawberry Chiffon Cake
- Preheat the oven to 170°C. Do not coat or cover the mold in anything Add the egg whites and salt to bowl #1. Add the egg yolks and the sugar for the egg yolks to bowl #2. Place the sugar for the egg whites and the corn starch into small bowl #1. Add the oil, strawberry juice (Refer to Steps 2 and 5), and liquor to small bowl #2. Prepare the flour in a sifter.

- Using a finely meshed strainer etc., mash up the strawberries and strain. Mix one teaspoon of the prepared strawberry juice with one teaspoon of the brandy, and prepare 70~80 ml. (I always prepare +80 ml. Using more allows you to enjoy the fragrance of the strawberries more, and it will become even more succulent, but it will shrink more after baking).

- Using a clean bowl and a clean high-speed hand mixer free of water and oil, add in the egg whites and salt, and whip. After it has thickened and fonts a ribbon off the mixer, add in the powdered sugar and corn starch in over 2~3 turns, and whip. Use a low speed for the last turn, go once around the bowl, and adjust the consistency.

- As for a measure of when the meringue is done, pick up a small amount of meringue from the bowl, and it should form a peak on the tips of the hand mixer blades. If the eggs are small, then add in another half portion of egg whites.

- Place the egg yolks and powdered sugar into a separate bowl, and mix (you don't have to wash it) with a hand mixer. After it has turned white and thickened like in the photo, add in the vegetable oil and Step 2, and mix. Do not add in the remaining strawberry pulp from the sieve. The taste and texture will turn bad (speaking from experience...)

- Add the flour to Step 5 in 2~3 batches while sifting. While turning the bowl, scoop up the batter with an egg beater, lift it up and drop it back in, take care not to knead it, and mix properly until the batter becomes uniform.

- Add 1/3 of the meringue from Step 4 to the bowl from Step 6, and mix well with an egg beater. Return it to the bowl from Step 4, switch to a spatula, scoop it up from the bottom and fold it onto itself, quickly and gently mixing it. It will not expand if you over mix it, but if there are white lumps remaining from the meringue, then a cavity will form, and it will cave in.

- As for how long to mix it, mix until the lumps of meringue are gone, and the batter becomes uniform. Step 7 shows in in a state of not being mixed enough. It will not plump up if you over mix it, but it will form air pockets in the cake, and will make a cavity when it cools, making it fall apart when you remove it from the mold. Let's mix it more-so than when mixing for a sponge cake.
- Pour the batter into the mold from a height of about 30 cm. Rotate the pan once slowly while tilting it at an angle, and let the batter crawl over the edges of the mold (This seems to help it plump up, gain a foothold on the pan, and remove the air bubbles). You don't need to knock out the excess air in the pan. Immediately bake in an oven at 170°C for 25 minutes.

- Just place the amount of batter that falls naturally into the mold. Do not scrape the bowl or spatula (batter that isn't mixed well will effect how well the cake rises). If you cook the remaining batter left in the bowl and on the spatula in a frying pan, you will be able to make one fluffy mini pancake like the one shown in the photo.
- Take it out of the oven immediately after baking, drop the mold from a height of 30cm to prevent it from shrinking. Place it upside down on top of a bottle or rice bowl, and let cool in the mold. After it has cooled, covering it into a plastic bag while still in the mold will make it even more rich. Let cool completely while still in the mold.
- Removing from the mold: The cake must be cooled before you start. Use a chiffon knife or a finely-serrated bread knife. While moving the knife up and down vertically with the teeth hitting the edges of the mold, go once around the circumference of the outer edges. In the same manner, go once around the center pipe. Remove the outer edge of the mold.
- Place a knife between the bottom of the cake and the mold, starting from the outer edges and working your wary towards the center, trace halfway around the circumference, and go once around the edges while moving the knife back and forth. Place it onto the plate on which you will serve it, flip the mold upside down, and remove the cake.
- To make milk tea flavored chiffon cake: Before beating the egg whites, place 2 tea packs into the a warmed cup from Step 1, pour in just enough water to soak it, cover with a lid such as a plate etc., and brew for the amount of time indicated on the tea package. Add anywhere from 1/2~2/3 milk to the cup.
- Part 2: In place of the fruit juice in Step 5, add in 70 g of the milk tea you made. In addition, using tea leaves that have been finely ground in a mill or in a mortar, add a little less than 3 g (a little less than one very light teaspoon)~10 g. Use a small amount of high quality leaves, and use a lot if using normal tea. I also like adding in several drops of vanilla extract.
- I use an aluminum mold. When using a paper, teflon or silicone chiffon mold or a paper muffin mold, then degree to which the cake shrinks away from the mold may vary. It'll be shriveled if you bake in a paper mold. If you are using anything aside from an aluminum mold, then use disposable paper cups! I also found that a stainless steel chiffon mold from the dollar store was tolerable.
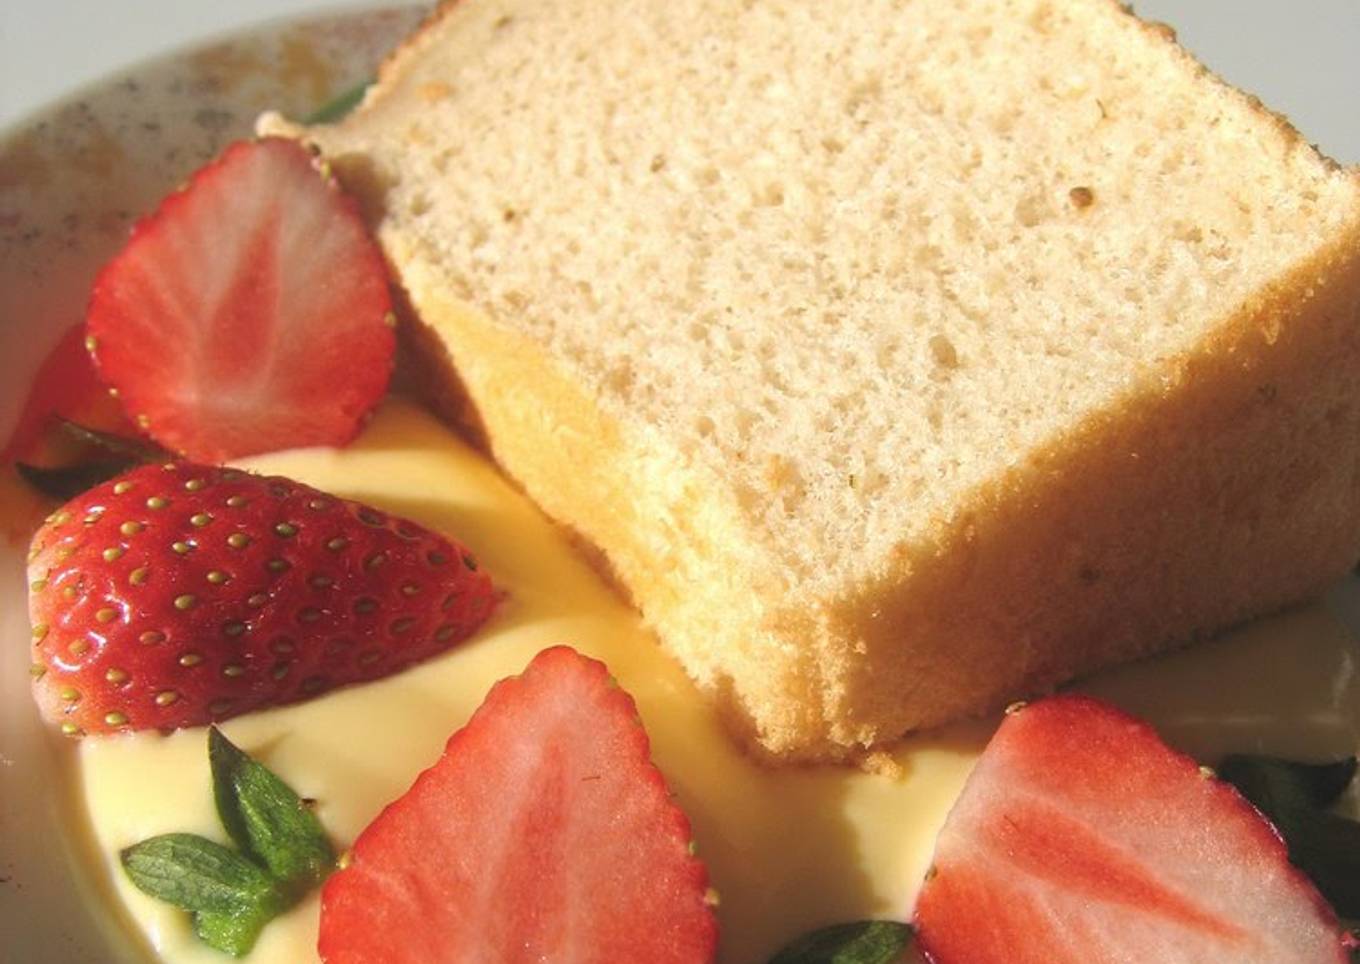
- User "Harukarubi" made a crème anglaise with the remaining egg yolk, and served it with her beautifully baked chiffon cake. She doubled the recipe amount in a 20 cm chiffon mold and baked for about 40 minutes! It has plumped up quite nicely.
Additionally you will discover as your own experience and confidence develops you will find your self increasingly more often improvising while you go and adjusting recipes to fulfill your personal preferences. If you prefer less or more of ingredients or want to make a recipe somewhat less or more hot in flavor you can make simple adjustments along the way to be able to achieve this objective. In other words you will start punctually to create recipes of your individual. And that is something which you may not necessarily learn when it comes to basic cooking skills to newbies however you'd never know if you didn't master those simple cooking abilities.
So that's going to wrap this up for this special food Recipe of Quick Fresh Strawberry Chiffon Cake. Thank you very much for reading. I'm confident you will make this at home. There's gonna be more interesting food in home recipes coming up. Remember to bookmark this page on your browser, and share it to your loved ones, friends and colleague. Thank you for reading. Go on get cooking!